Working with Projects
Creating a Project
- Click the "New Project" button on your dashboard
- Enter a project title and optional description
- Choose a project slug (URL-friendly name)
- Click "Create" to start your project
Your project is created with a default folder structure:
- Chapters folder for your story content
- Chapter 1 document to get you started
Project Structure
Folders
Organize your work with folders:
- Right-click in the project tree to create new folders
- Drag and drop to move folders and files
- Nested folders for complex organization (e.g., Act 1 > Chapter 1 > Scenes)
Documents
Create different types of documents:
- Text documents - For chapters, scenes, and prose
- Worldbuilding entries - Structured elements for your story world
- Notes - For research, outlines, and planning
Editing Documents
Rich Text Editor
The editor supports:
- Basic formatting: Bold, italic, underline
- Headings: H1, H2, H3 for structure
- Lists: Bulleted and numbered lists
- Block quotes: For emphasis or citations
- Markdown shortcuts: Type
#for headings,*for bullets
Keyboard Shortcuts
Text Formatting
Ctrl/Cmd + B- BoldCtrl/Cmd + I- ItalicCtrl/Cmd + U- UnderlineCtrl/Cmd + Shift + X- StrikethroughCtrl/Cmd + E- Inline codeCtrl/Cmd + \- Clear formatting
Block Formatting
Ctrl/Cmd + 0- Normal paragraphCtrl/Cmd + 1throughCtrl/Cmd + 6- Headings 1-6Ctrl/Cmd + Shift + 7- Bullet list (toggle)Ctrl/Cmd + Shift + 8- Numbered list (toggle)Ctrl/Cmd + Shift + 9- BlockquoteCtrl/Cmd + Shift + H- Horizontal rule
General
Ctrl/Cmd + Z- UndoCtrl/Cmd + Shift + Z- Redo
Changes are saved automatically in real-time. There is no manual save required.
Real-Time Collaboration
When collaborators are editing:
- See their cursor position and selections
- Changes appear instantly as they type
- Conflict-free editing - write simultaneously without issues
- User indicators show who's currently active
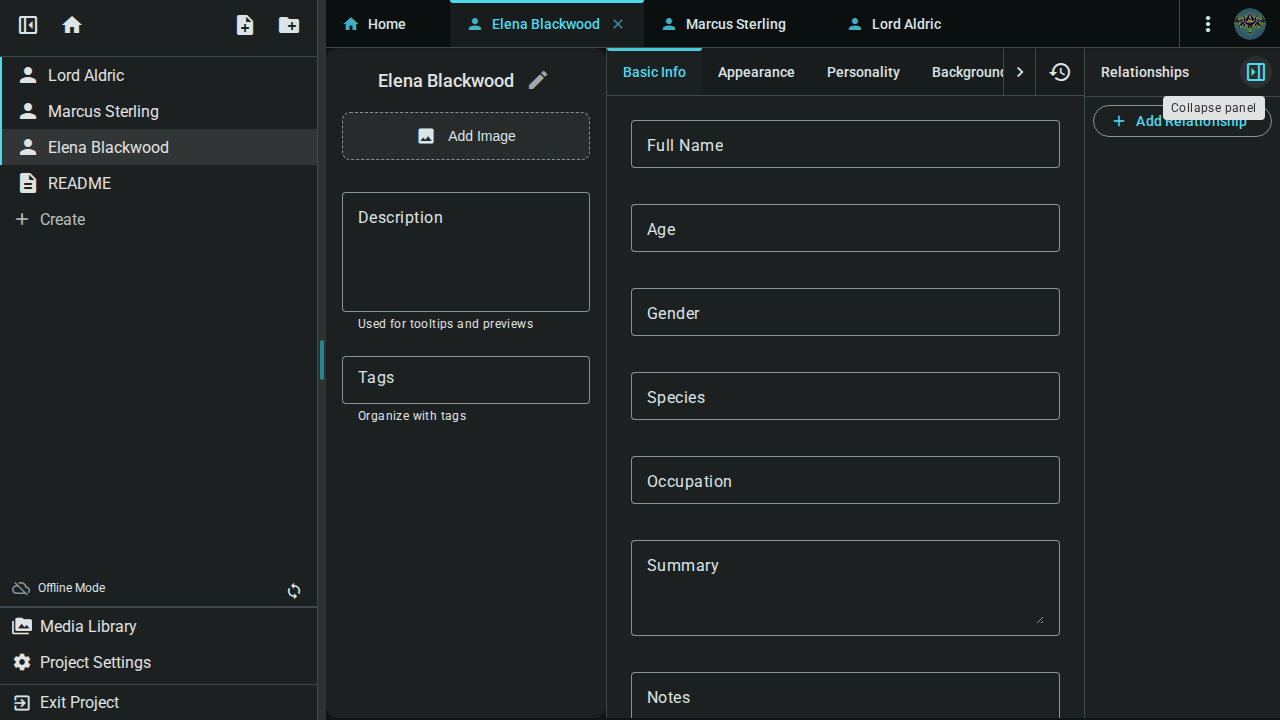
Worldbuilding Elements
Inkweld uses a flexible element system for worldbuilding. Elements are structured entries that you define to match your story's needs—characters, locations, factions, items, magic systems, or anything else your world requires.
Creating Elements
- Right-click in your project tree
- Select "New Worldbuilding Entry"
- Choose a template or create a new one
- Fill in the structured fields
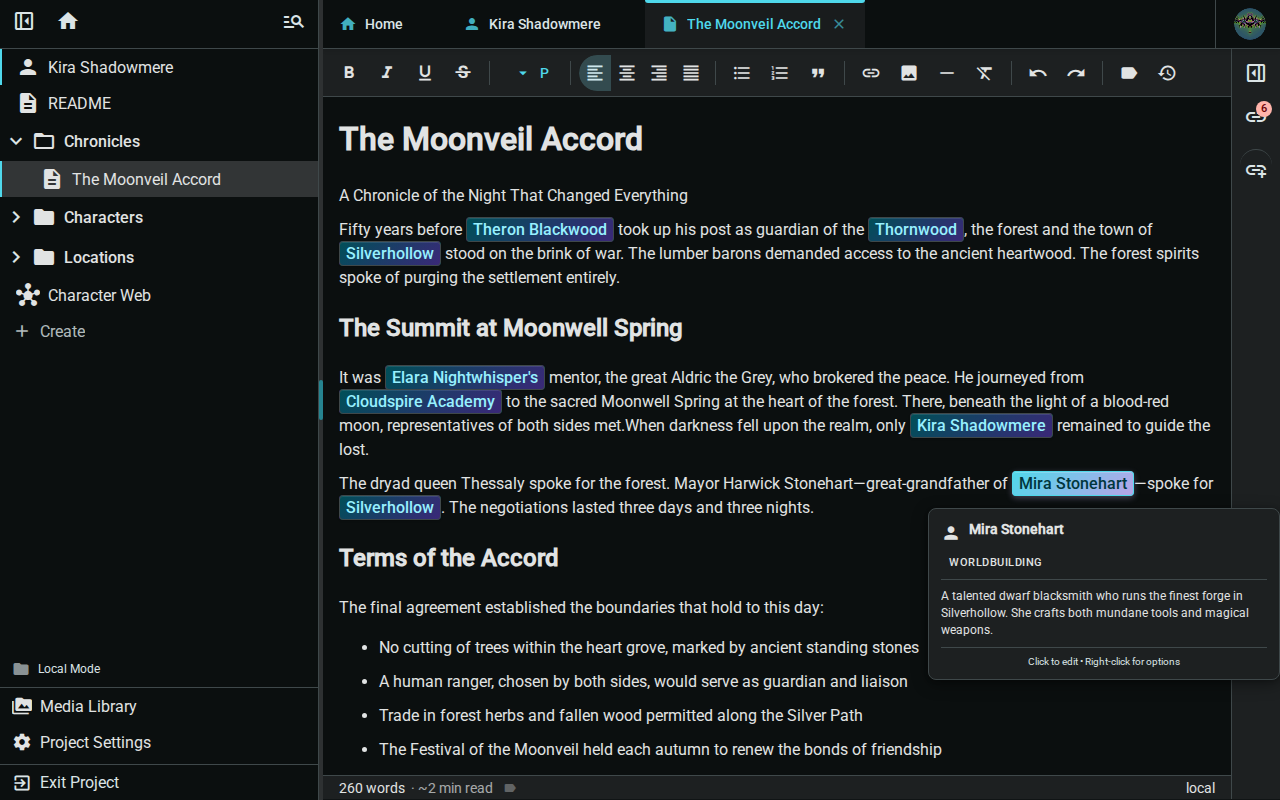
Once you've created elements, use @ mentions in your documents to link to them. See Element References for details.
Templates
Every worldbuilding element uses a template that defines its structure. Templates are fully customizable:
- Go to Project Settings → Templates
- Click "Create Template"
- Define custom tabs and fields
- Use your template for new entries
Examples of templates you might create:
- Character - Names, descriptions, personality, backstory
- Location - Settings with descriptions, history, notable features
- Faction - Organizations, governments, or groups
- Item - Artifacts, weapons, or magical objects
- Event - Historical moments or timeline entries
- Species - Races, creatures, or beings in your world
Inkweld includes a few demo templates to help you get started, but you can modify these or create entirely new ones to match your story's unique needs.
Offline Work
Working Offline
Inkweld works without internet:
- Open your project while online (loads data to cache)
- Go offline - Continue writing as normal
- Changes save locally automatically
- Reconnect - Changes sync automatically
Sync Status
Check the sync indicator in the toolbar:
- Green indicator: All changes synced to the server
- Yellow indicator: Sync in progress
- Red indicator: Connection issue — changes are saved locally and will sync when you reconnect
Project Settings
Access settings from the project menu:
- Project details - Edit title, description, slug
- Collaborators - Invite team members and manage access
- Publishing - Configure and run export plans
- Delete - Permanently remove the project
Publishing Your Work
Export Formats
Inkweld supports multiple export formats:
- EPUB - E-book format for Kindle, Kobo, Apple Books, and more
- PDF - Print-ready documents with professional formatting
- HTML - Web-ready single-page exports
- Markdown - Plain text format for maximum portability
Creating a Publish Plan
- Open your project and go to the Home tab
- Click "New Publish Plan" in the Publishing section
- Configure your export:
- Name: Give your plan a descriptive name
- Format: Choose EPUB, PDF, HTML, or Markdown
- Metadata: Set title, author, description, and language
- Options: Configure table of contents, chapter numbering, and styling
Adding Content to Your Plan
- Open your publish plan
- Use "Add Content" to include:
- Documents: Add chapters and scenes from your project
- Frontmatter: Title pages, copyright notices, dedications
- Backmatter: Author bio, acknowledgments, appendices
- Table of Contents: Auto-generated navigation
- Separators: Scene breaks and chapter dividers
- Drag and drop to reorder items
- Save your plan for reuse
Generating Your Export
- Open your publish plan
- Click "Generate"
- Wait for processing (happens in your browser)
- Download the finished file
All exports happen client-side—your content never leaves your device during generation.
Quick Export
For simple exports without creating a plan:
- Go to the Home tab
- Click "Quick Export"
- Select documents to include
- Choose a format
- Download immediately
Tips for Organization
Chapter Organization
📁 Act 1
  📁 Chapter 1
    📄 Scene 1 - Opening
    📄 Scene 2 - Inciting Incident
  📁 Chapter 2
    📄 Scene 1 - Rising Action
Worldbuilding Organization
📁 People
  📄 Protagonist
  📄 Antagonist
  📁 Supporting Cast
📁 Places
  📄 Main City
  📄 Wilderness
📁 Factions
  📄 The Guild
  📄 The Empire
📁 Timeline
  📄 Past Events
  📄 Story Timeline
Next Steps
- Learn to link elements inline with Element References
- Define structured connections with Relationships
- Categorize your content with Tags